
Applying false eyelashes is widely considered one of the most intimidating makeup techniques, but it doesn’t have to be. Lifted inner corners, misplaced bands, and sticky glue on the eyelids are usually the result of rushing two crucial steps: trimming the band to fit your eye shape and waiting for the adhesive to become tacky.
Once you master the proper technique, applying strip lashes takes less than two minutes and instantly transforms your eyes with seamless volume.
1. Comparing Lash Types & Application Tools
Choosing the right type of false lash and adhesive combination ensures all-day comfort without damaging your natural lashes:
| Lash Category | Best For | Application Method | Holding Power |
| Strip Lashes (Full Band) | Dramatic looks, full volume, makeup beginners. | Brush-on lash adhesive applied directly to the band. | 8–12 hours |
| Individual / Cluster Lashes | Customizable volume, natural everyday enhancement. | Dipped in adhesive and placed under or over natural lashes. | 1–3 days (with long-wear bond) |
| Magnetic Lashes | Glue-free application, sensitive eyes. | Magnetic liquid eyeliner or sandwiching dual magnetic strips. | 6–8 hours |
| Pre-Glued / Press-On Lashes | Quick touch-ups, ultra-convenient travel routine. | Self-adhesive strip pressed directly onto natural lash line. | 4–6 hours |
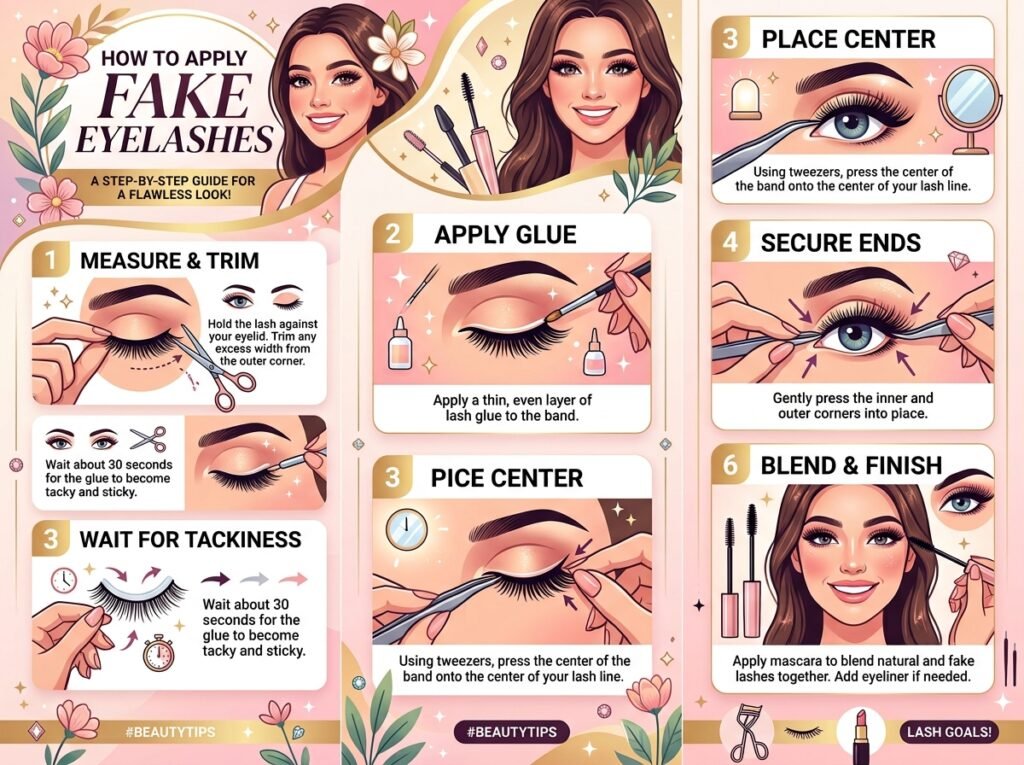
2. Step-by-Step Guide to Applying Strip Lashes
Follow this precise routine for seamless, long-lasting placement that stays comfortable all day.
- Prep Natural Lashes & Apply Eyeliner:
Prepares your natural lashes to support the weight of the falsies.
Curl your natural lashes with an eyelash curler and apply a thin layer of mascara. Draw a thin line of dark liquid or gel eyeliner along your upper lash line to conceal the false lash band once placed.
2. Measure and Trim the Band:
Prevents the outer corners from poking your eye or lifting during the day.
Gently remove the strip lash from its tray using tweezers. Hold it against your eyelid to measure length. The lash band should start a few millimeters away from your inner tear duct and end right at your outer corner. Always trim excess band from the outer edge using small lash scissors.
3. Flex the Band & Apply Glue:
Softens rigid lash bands to contour smoothly to your eyelid shape.
Bend the lash band into a “U” shape for 10 seconds to loosen its curve. Apply a thin, even layer of lash adhesive along the band, adding a tiny extra dot to the inner and outer tips.
4. Wait 30 Seconds for Glue to Become Tacky:
Crucial Step: The secret to instant adhesion without sliding.
Do not apply the lash immediately while the glue is wet. Wait roughly 30 to 40 seconds until the adhesive changes from liquid to a tacky, rubbery consistency.
5. Place Center-First, Then Secure the Ends:
Secures the strip along your natural lash root.
Look down into a handheld mirror placed at chest level. Using tweezers or a lash applicator, place the center of the false lash directly onto the middle of your lash line. Next, press down the outer corner, followed by the inner corner.
6. Pinch and Fuse Together:
Blends natural and synthetic lashes into a single seamless fringe.
Once the glue sets, gently pinch your natural lashes and the false lash band together using your fingers or a lash applicator. Trace over the band with liquid eyeliner if needed to disguise any dried glue.
3. Essential Pro Tricks for Misfit & Lifted Lashes
- Use the Downward Mirror Technique: Never look straight into a wall mirror when applying lashes. Looking down into a compact mirror tilts your eyelid flat, giving you a clear view of your natural lash line without closing your eye.
- Fix Lifting Corners with a Toothpick: If an inner or outer corner lifts during the day, dab a microscopic amount of lash glue onto the tip of a toothpick or clean bobby pin and slide it under the lifted strip end.
- Remove Safely Without Ripping Natural Lashes: Soak a cotton pad in micellar water or an oil-free makeup remover, press it against your closed eyelid for 20 seconds to dissolve the adhesive, and gently peel the lash off from the outer corner inward.