
Few things are as frustrating as removing a fresh gel manicure only to find your natural nails paper-thin, bendy, and snapping at the slightest pressure. Gel polish itself doesn’t inherently ruin natural nails—rather, it is aggressive mechanical scraping, improper acetone soaking, or peeling gel off that strips away your nail’s protective top keratin layers.
When those outer layers tear off, the remaining nail plate loses its structural rigidity and moisture balance, leading to constant splitting, throbbing sensitivity, and continuous breakage. Fortunately, with a targeted rehab routine, you can stop the breakage cycle and rebuild strong, healthy natural nails.
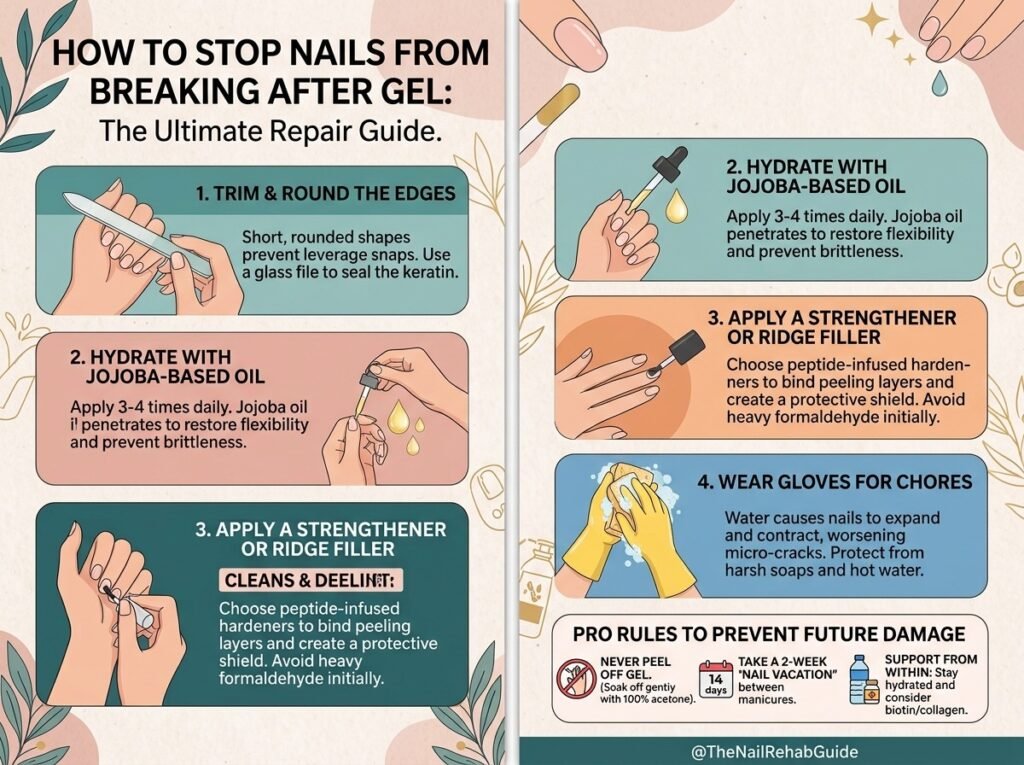
Why Nails Break Post-Gel: Understanding the Damage
Rebuilding damaged nails starts with identifying what your natural nail bed is missing after gel removal:
| Damage Factor | Physiological Impact | Target Treatment |
| Keratin Layer Loss | Extreme thinning causing nails to bend backward or throb | Micro-keratin hardeners & protective sealers |
| Acetone Dehydration | Loss of natural intercellular lipids, making nails brittle | Jojoba oil intensive soaking & lipid replenishment |
| Surface Micro-Tears | Rough patches and peeling edges that catch and snag | Gentle ridge filling & low-grit smoothing |
| Free-Edge Snags | Cracks expanding into the live nail bed | Short rounding & regular edge sealing |
Most post-gel damage starts with the removal, so next time follow our gentle at-home gel removal method or our step-by-step gel manicure removal guide.
Step-by-Step Post-Gel Repair & Recovery Routine
- Trim Down & Round the Edges:
Prevents leverage snaps on fragile, thinned natural nails. Clip your nails down short immediately after gel removal. Long, thin nails create leverage points that snap easily. Shape them into a soft, rounded square using a glass nail file, which seals the keratin layers instead of leaving jagged micro-frays like metal files.
2. Saturate with Jojoba-Based Cuticle Oil:
Deeply penetrates the nail plate to restore lost flexibility. Apply a jojoba oil or almond oil blend to your nail plates and cuticles at least 3 to 4 times daily. Jojoba oil molecules are small enough to penetrate the natural nail matrix, replenishing lost moisture so your nails bend slightly under stress instead of snapping off.
- Apply a Keratin Strengthener or Ridge Filler:
Binds peeling keratin layers and acts as a protective shield. Apply a thin layer of a peptide-infused nail hardener or ridge filler. Avoid heavy formaldehyde-based hardeners right away, as they can make ultra-thin nails brittle. The hardener acts as a sacrificial barrier against daily wear and water absorption.
4. Wear Gloves for Daily Chores:
Protects natural oils from being stripped by hot water and soap. Water is the enemy of damaged nails. When your keratin layers are thin, absorbing water causes the nail plate to expand; as it dries, it contracts, worsening micro-cracks. Always wear rubber gloves when washing dishes, cleaning, or handling household chemicals.
Pro Rules to Prevent Future Gel Damage
- Never peel or pick lifting gel: Peeling off gel polish rips away up to 50% of your natural nail plate’s thickness in one swipe. Always soak off gently with 100% pure acetone and warm wraps.
- Take a 2-week “nail vacation”: If your nails feel sensitive, bendy, or thin after gel removal, take a mandatory 14-day break before booking your next gel application to let the top layers recover strength.
- Incorporate daily collagen or biotin: Support new nail growth from the inside out by drinking plenty of water and taking a collagen or biotin supplement to encourage dense keratin formation at the matrix.
Explore more beauty guides: Nails