
Acrylic extensions give you length, strength, and endless nail art possibilities. However, when they start growing out or lifting around the edges, the temptation to pry them off with a card, dental floss, or your own teeth is real. Resist that urge! Ripping off acrylics strips away natural keratin layers, leaving your nails paper-thin, weak, and susceptible to painful fungal infections.
Acrylic polymer creates a hard, durable shell fused to your natural nail bed. Safely taking them off requires breaking down that acrylic bond chemically with pure acetone while keeping your natural nails intact and healthy.
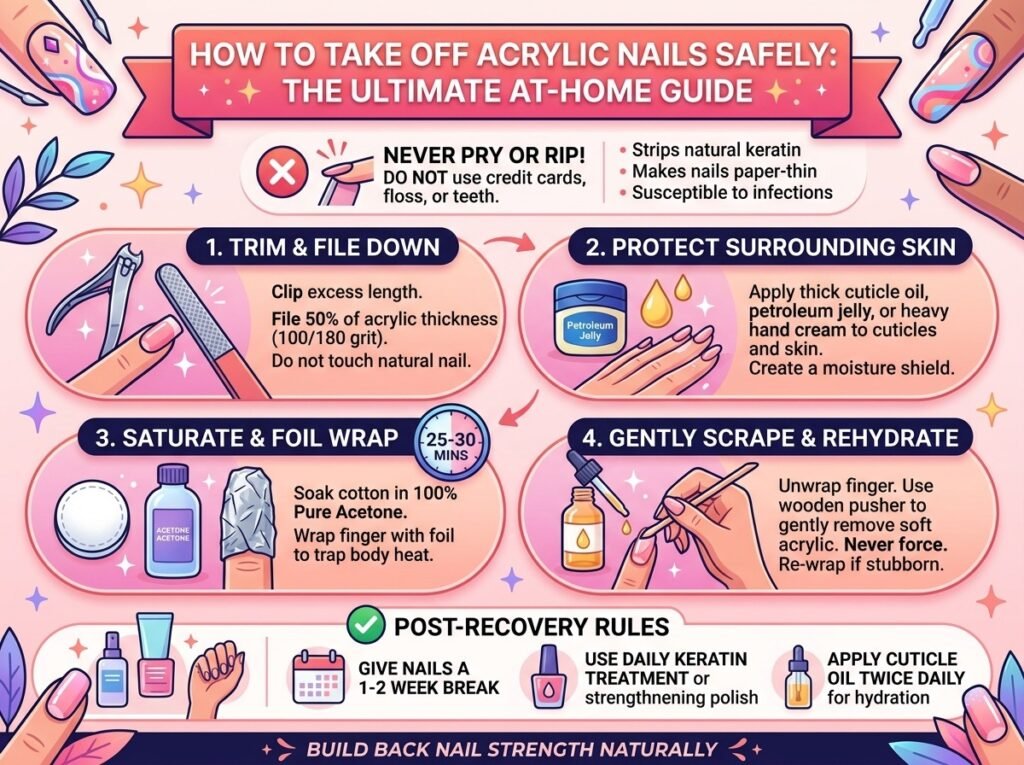
Comparing Removal Methods: What Works vs. What Hurts
Before diving in, choose the removal approach that matches your tools and time:
| Method | Breakdown Agent | Safe Level | Best Used For |
| Foil Wrap Method (Recommended) | 100% Pure Acetone + Heat | Safest | Full set removal without over-exposing surrounding skin to excess drying. |
| Acetone Bowl Soak | 100% Pure Acetone Liquid | Effective but Drying | Fast removal, though it strips natural oils from the entire fingertip. |
| Warm Water & Oil Soak | Warm Water + Dish Soap + Oil | Gentle / Slow | Loose or lifting acrylics only; will not dissolve a fully adhered set. |
Step-by-Step Safe Acrylic Removal Procedure
- Trim Length & File Down Top Layer:
Reduces the volume of acrylic that needs to dissolve. Use a heavy-duty nail clipper to trim off any excess acrylic extensions down to your natural nail length. Next, take a coarse nail file (100/180 grit) and file away the shiny top coat and about 50% of the acrylic thickness. Do not file down to your natural nail.
- Protect Cuticles & Surrounding Skin:
Prevents harsh skin dehydration and chemical stinging. Apply a generous layer of petroleum jelly, thick cuticles oil, or heavy hand cream over the skin, cuticles, and side walls surrounding each nail. This creates a moisture shield against pure acetone.
3. Saturate with Acetone & Foil Wrap:
Traps body heat to break down the hardened acrylic polymer. Soak a cotton ball or pad completely in 100% pure acetone. Place it directly over the filed acrylic nail and wrap a square piece of aluminum foil tightly around the fingertip to seal in heat. Let it sit completely undisturbed for 25 to 30 minutes.
4. Gently Scrape Softened Acrylic & Rehydrate:
Gently clears dissolved acrylic without scraping natural keratin. Unwrap one finger at a time. The acrylic should look gummy, soft, and melted. Use an wooden cuticle pusher to gently glide the melted acrylic off the nail. If any spots feel hard or stubborn, re-wrap for another 10 minutes—never force or pry it off. Once clean, wash your hands and immediately massage cuticle oil into the nail beds.
Essential Post-Removal Recovery Rules
- Never pry or force lifting edges: Forcing a tool under a lifting acrylic tears away the delicate dorsal layer of your natural nail plate, taking months to regrow.
- Avoid non-acetone alternatives for full removal: Regular nail polish remover is too weak to dissolve acrylic polymers. You will end up scraping forcefully and causing mechanical damage.
- Build back nail strength: Give your nails a 1 to 2-week break after acrylic removal. Use a daily keratin treatment or strengthening polish, and apply cuticle oil twice daily to restore lost hydration.